vCenter Server Appliance is Linux (SUSE Linux Enterprise Server 11 64 bit) based appliance, which in a near feature should replace or become equivalent to vCenter server installed on Windows box – maybe in the feature but not now 🙂 . As like every new or fairly new product , vCenter Server Appliance has some functional limitation with comparison to vCenter server installed on Windows box such as:
- Lack of HB product – vCenter server installed on Windows box has nice product called VMware vCenter sever Heartbeat, (BTW. VMware stopped developing this product, which is obvious sing from them that vCenter Server Appliance become equal in terms of functionality to vCenter on Windows Server) which protect vCenter server and it’s components against software and hardware failure.
- only Oracle is supported as external DB source
- LinkMode is not supported
- and few more things – check it here if you would like to hear learn more about differences between vCenter server appliance and vCenter server installed on Windows OS.
Nevertheless, vCenter Server Appliance is a good fit for home lab, SMB and even for enterprise customers, that’s why I see value to get familiar with it and deploy it at my home lab.
vCenter Server Appliance Deployment.
- Download OVF from VMware repositories and import into your system.
- Power VM on
vCenter Server Appliance initial configuration.
- Connect to appliance IP address it HTTP address on port 5480, if you have DHCP you can find IP on the welcome screen from virtual machine console
- Log in using root as username and vmware as password
- Accept license agreements
- Configure options, if you are not sure what to choose go with Configure with default settings otherwise chose Set custom configuration
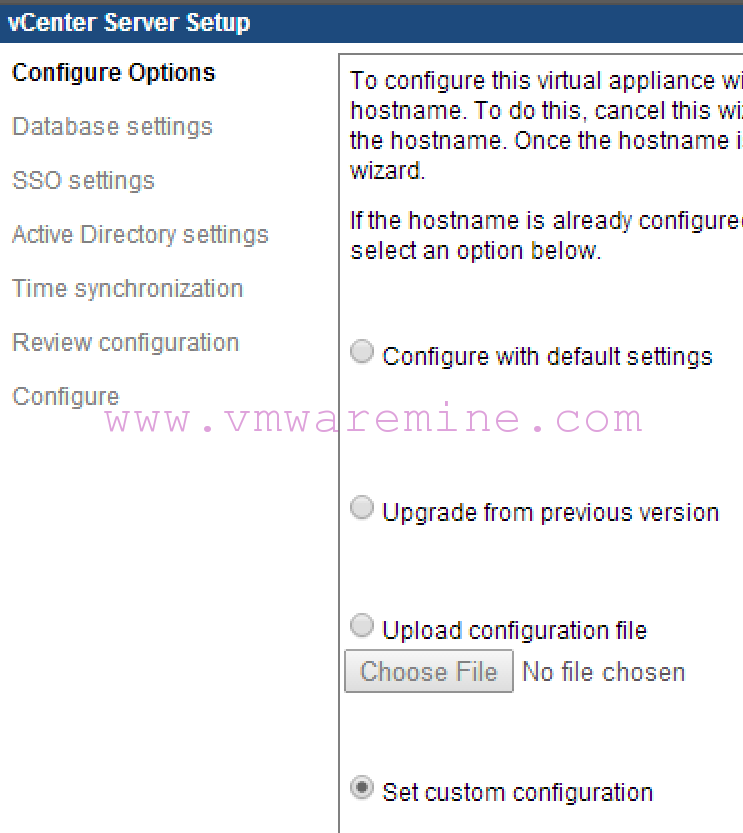
vCenter server appliance
- choose DB type, there are only two options embedded or Oracle
- configure SSO, choose between embedded or external, if you choose embedded it is enough to provide password for administrator@vsphere.local (write it down, you will needed it later on) otherwise provide all info needed to connect to external Single Sign-On service
- Enable AD integration if you have Active Directory
- Enable and configure NTP synchronization
- Review configuration and punch Start button
- Wait up to 10 minutes and you are ready to go.
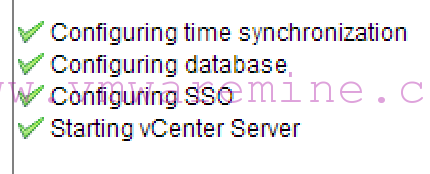
vCenter server appliance configuration status
vCenter sever Appliance – verify services and initial configuration
- One more time log in to vCenter server with root as username and vmware as password credentials to configuration plane on port 5480
- Go to vCenter server tab –> Summary tab and check displayed info on dashboard
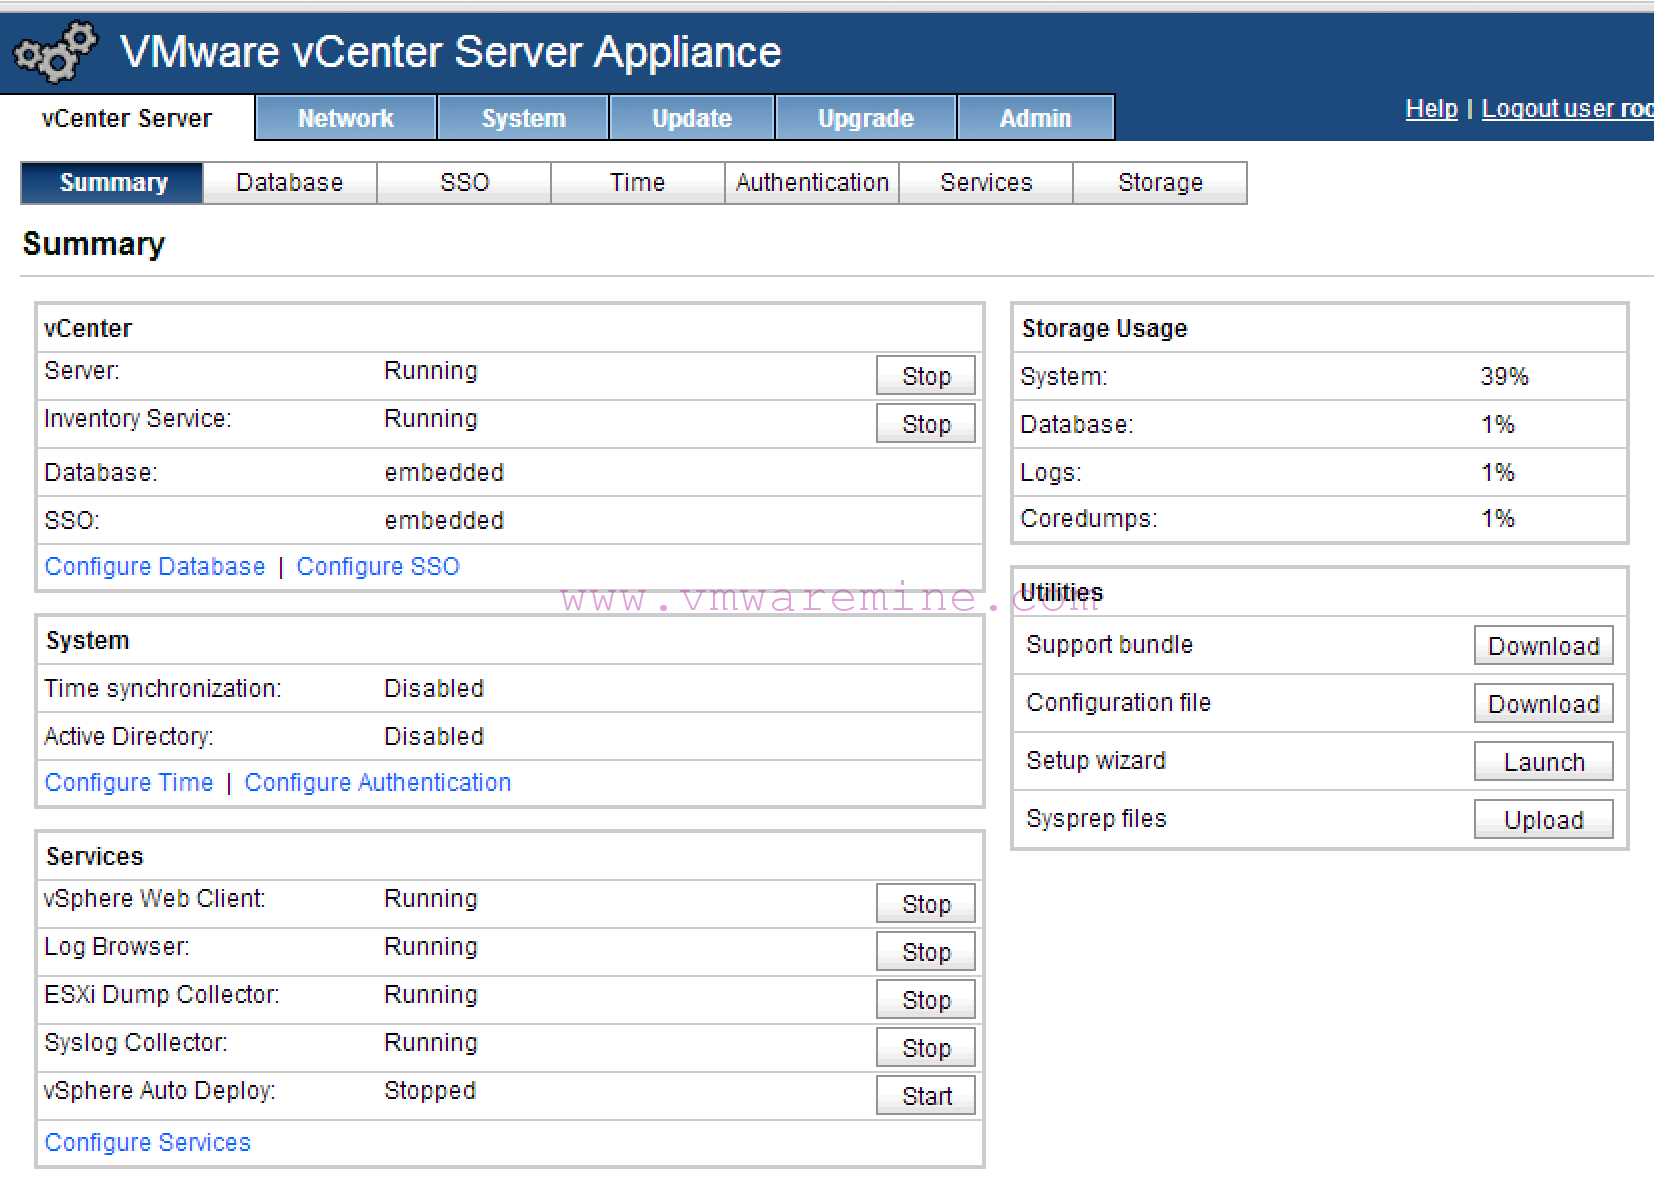
vCenter server appliance configuration dashboard
- I suggest to change IP address from DHCP to static. To do that go to Network –> Address and set proper host name and IP address for the appliance.
- Reboot vCenter server appliance
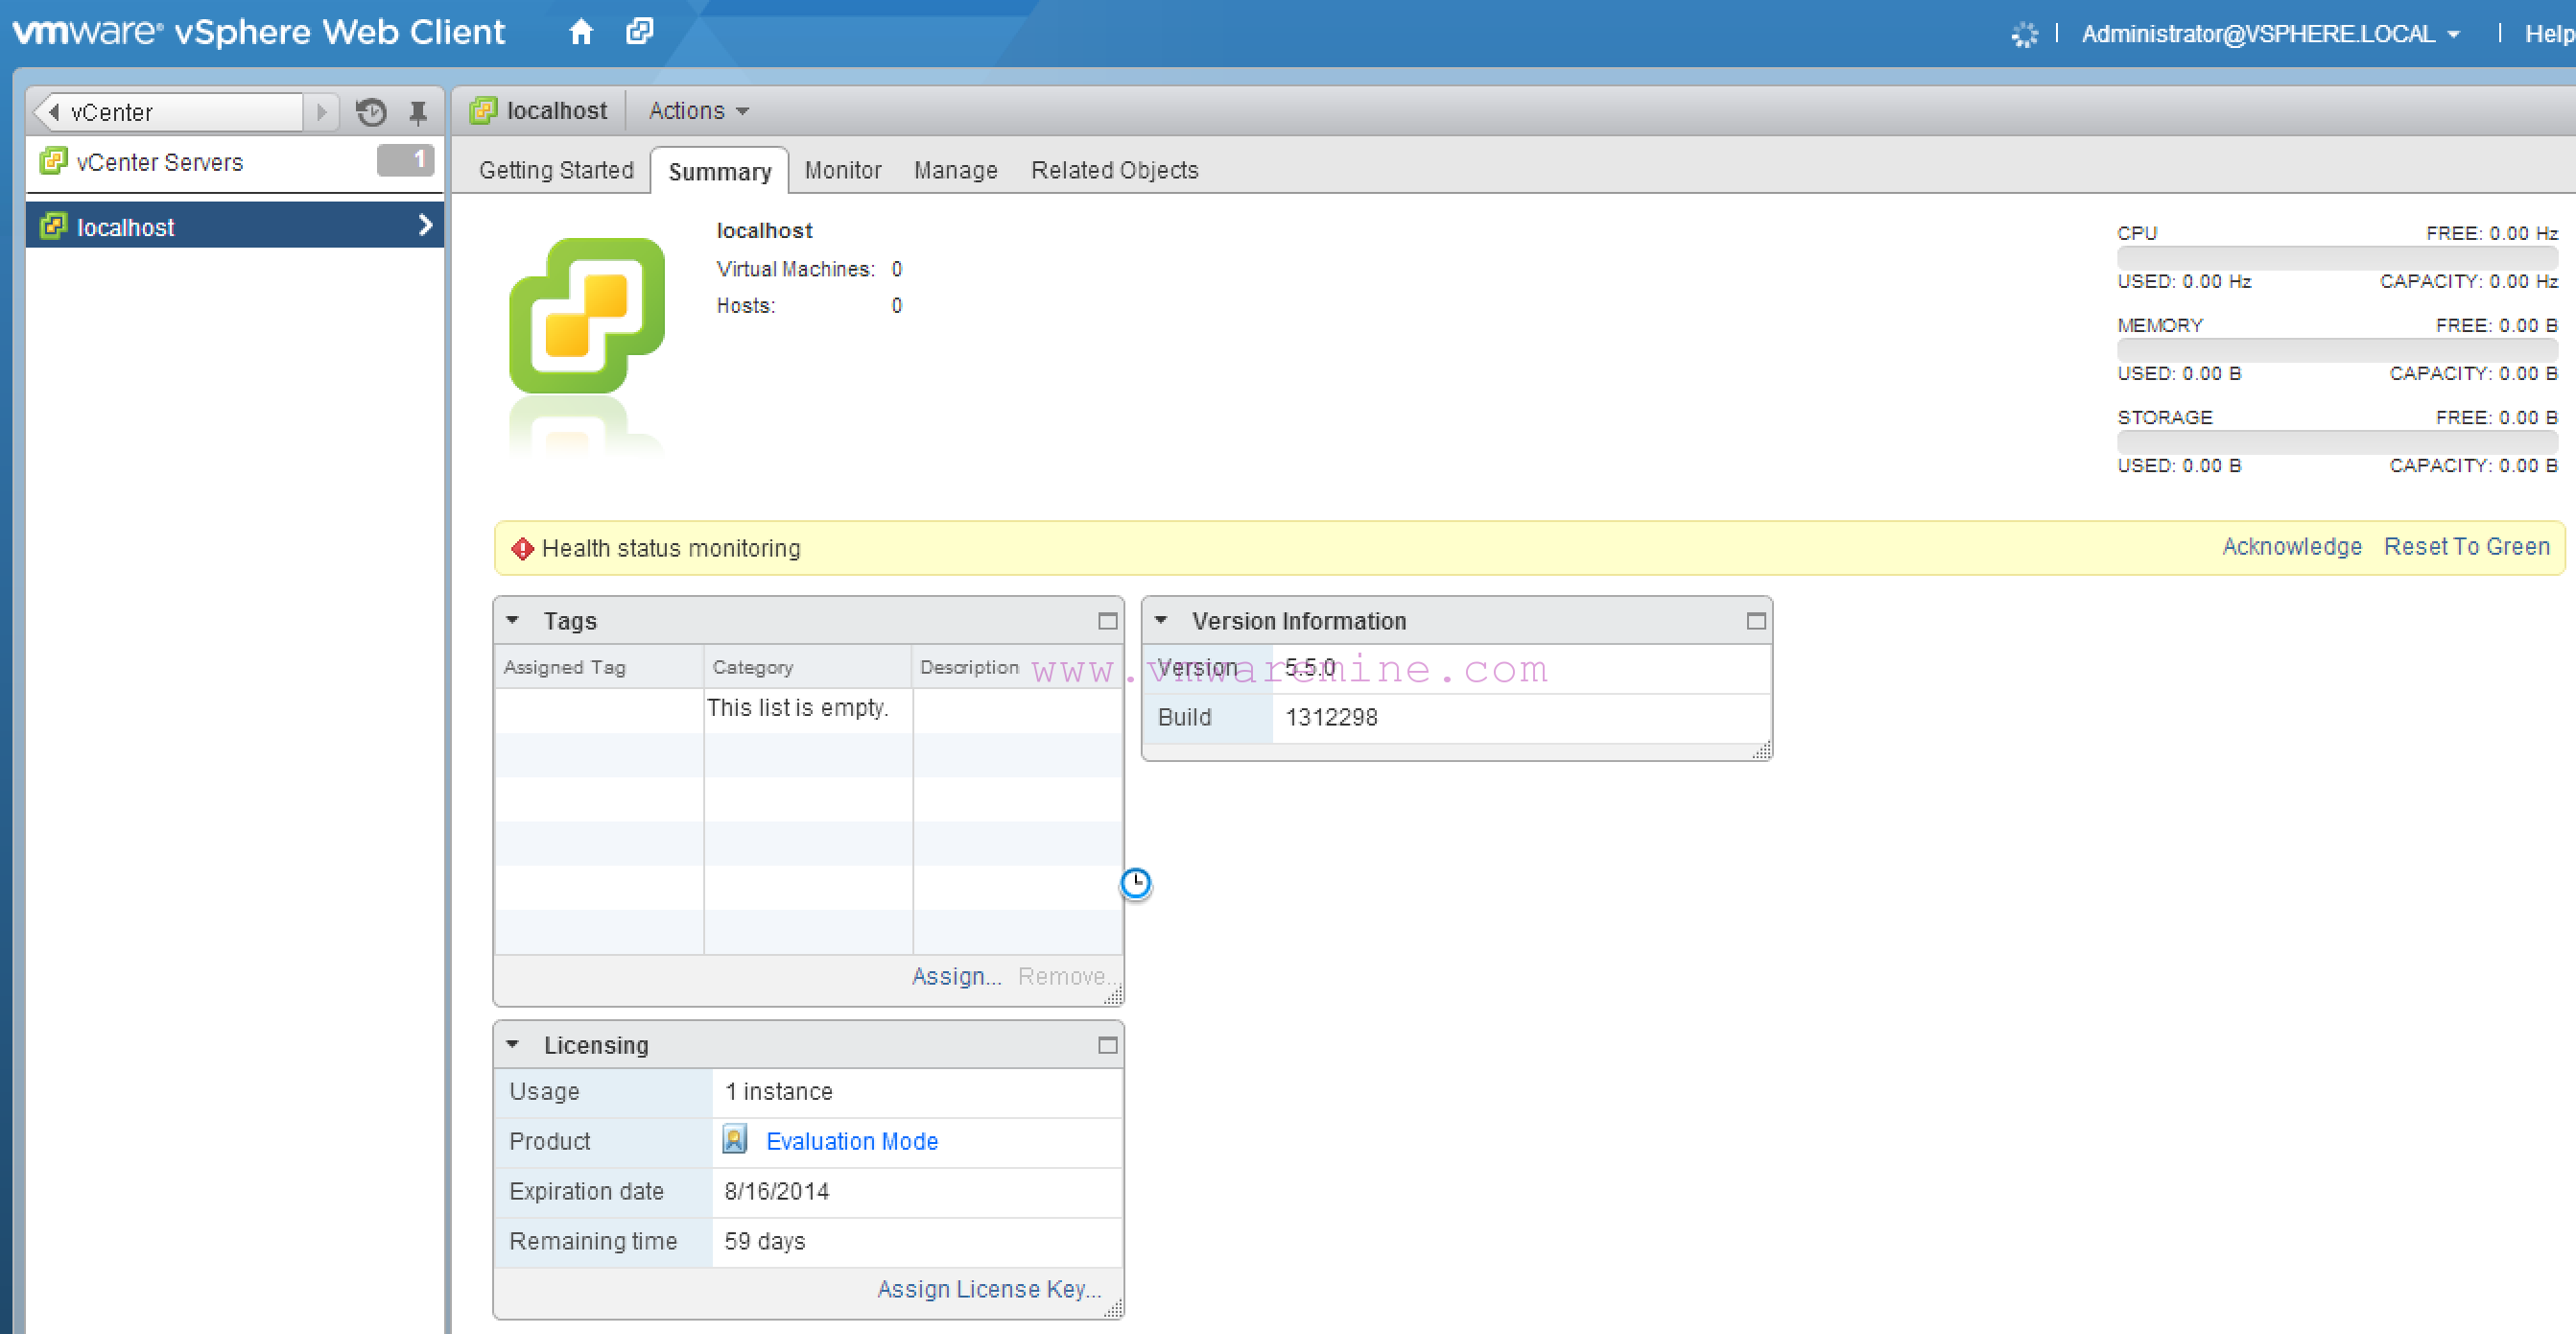
vCenter Server Appliance – first log in to vCenter.
- Open web browser and log in to vCenter Server Appliance by adding port 9443 after FQDN or IP address. Port 9443 is a vSphere Web client service is listening on it.
- Provide password for administrator@vsphere.local and here you go, you are successfully log into vCenter server running on Linux SUSE virtual machine
If all is OK, you can proceed with vCenter server configuration like you used to do it with standard vCenter server installed on Windows box.