What is Infoblox
Infoblox vNIOS for Nutanix™ AHV (Acropolis Hypervisor) is a virtual appliance designed for Nutanix AHV. Infoblox supports the deployment of vNIOS on Nutanix AHV 5.11, 5.15, and 5.20.3.
What is Nutanix AHV
Nutanix AHV is a highly customized hypervisor based on Linux KVM. As the default option for Nutanix HCI, the native Nutanix hypervisor, AHV, represents a unique approach to virtualization that offers the powerful virtualization capabilities needed to deploy and manage enterprise applications. AHV compliments the HCI value by integrating native virtualization along with networking, infrastructure, and operations management with a single intuitive interface – Nutanix Prism.
Looking ti migrate to Nutanix AHV, see my migration guide
Deploy Infoblox appliance on Nutanix AHV
First what you have to do after downloading the image from Infoblox is to upload the image to Prism Central. Go to Computer and Storage –> Images –> Add image
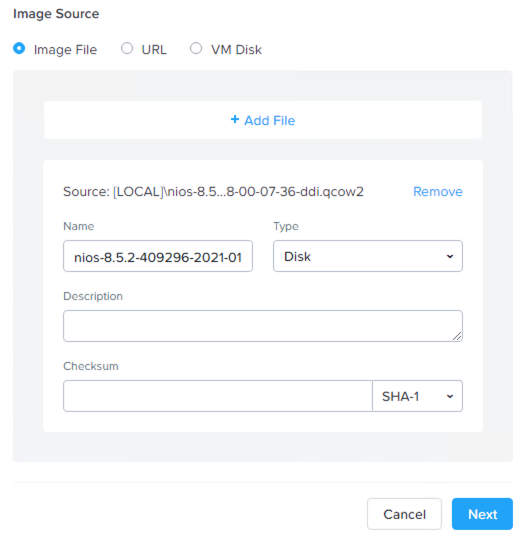
After the upload is completed, create VM with the following hardware configuration
NOTE: below hardware, config is for lab only. For production configuration, refer to Infoblox’s official documentation
- 2 vCPU
- 12GB RAM
- 2 vNIC
NOTE: do not power VM on after creation!!!
Next, log in to the Nutanix cluster over SSH and run the following commands
acli vm.listFind Infoblox VM UUID and run command
acli vm.update <VM_UUID> disable_branding=trueNow, you can power the VM on. After the boot operation is completed, VM will be configured with the default IP address on the LAN1 network – 192.168.1.2
Lunch VM console from Prism and log in to appliance with default Infoblox credentials admin\infoblox
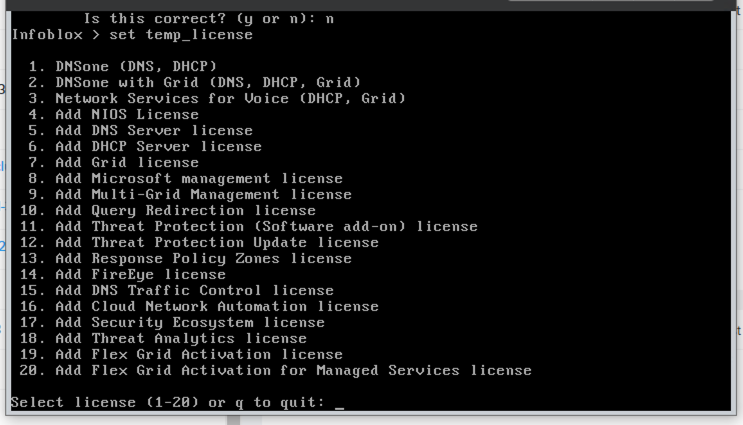
Run command set network to configure networking on VM. Follow the networking configuration wizard to complete the configuration. Reboot VM after configuring an IP address. Log in again to the appliance – this time you can use SSH as VM has a correct IP address and set a temporary license – set temp_license From the list, pick up the services you want to use, and type the number next to the service. Reboot VM.
After reboot, you can log in to web UI using default Infoblox credentials admin/infoblox. On the first login, the system will ask you a few questions like if you want to join GRID or not.